MonoGame and Other Tools
Table of Contents
- Basic Information
- Links and Official Samples
- Game Design Guides
- MonoGame Labs and Tutorials
- MonoGame Tutorials (External)
- Installing MonoGame
- Git Resources
Basic Information
We are using MonoGame 3.8.1 build 303 with Microsoft Visual Studio Community 2022.
Links and Official Samples
Game Design Guides
- “Let’s Talk Games” - Game Design Primer by Timur Anvar
MonoGame Labs and Tutorials
MonoGame Tutorials (External)
- Spritesheet Animation
- MonoGame Content Builder Information
- http://rbwhitaker.wikidot.com/monogame-2d-tutorials
Installing MonoGame
Windows
We will want to download the Community 2022 version of VS from the drop-down, but otherwise these instructions from MonoGame are accurate.
Mac
NOTE: Tested on Intel chip
Follow the same link as above to download Visual Studio 2022
When the installer asks what you’d like to install:
- .NET
- .NET Multi-platform App UI
- macOS (Cocoa)
This will take a while.
From the MonoGame github release channel https://github.com/MonoGame/MonoGame/releases, download MonoGame.Templates.VSMacExtension_3.8.1.303.mpack
Once Visual Studio is installed:
- Launch VS
- Go to Visual Studio -> Extensions…
- Click Install from file…
- Select the .mpack downloaded above.
Clicking through the Oks, it will advise you that there was an error but installed it anyway. This is a known issue https://github.com/MonoGame/MonoGame/issues/7960.
From the above issue report, the recommended course of action is to enter in the Terminal:
dotnet new --install MonoGame.Templates.CSharp
When you open VS and select New, a MonoGame Cross-Platform project template may appear as a Recent option. If not, go to the bottom under Other, then Custom, and select MonoGame Cross-Platform Desktop Application.
Note, after around 30 days, VS will warn you that your license has expired and require you to sign in to your Microsoft account to proceed. Logging in to the SSO for UVA was sufficient for continued access.
Git Resources

Tutorials
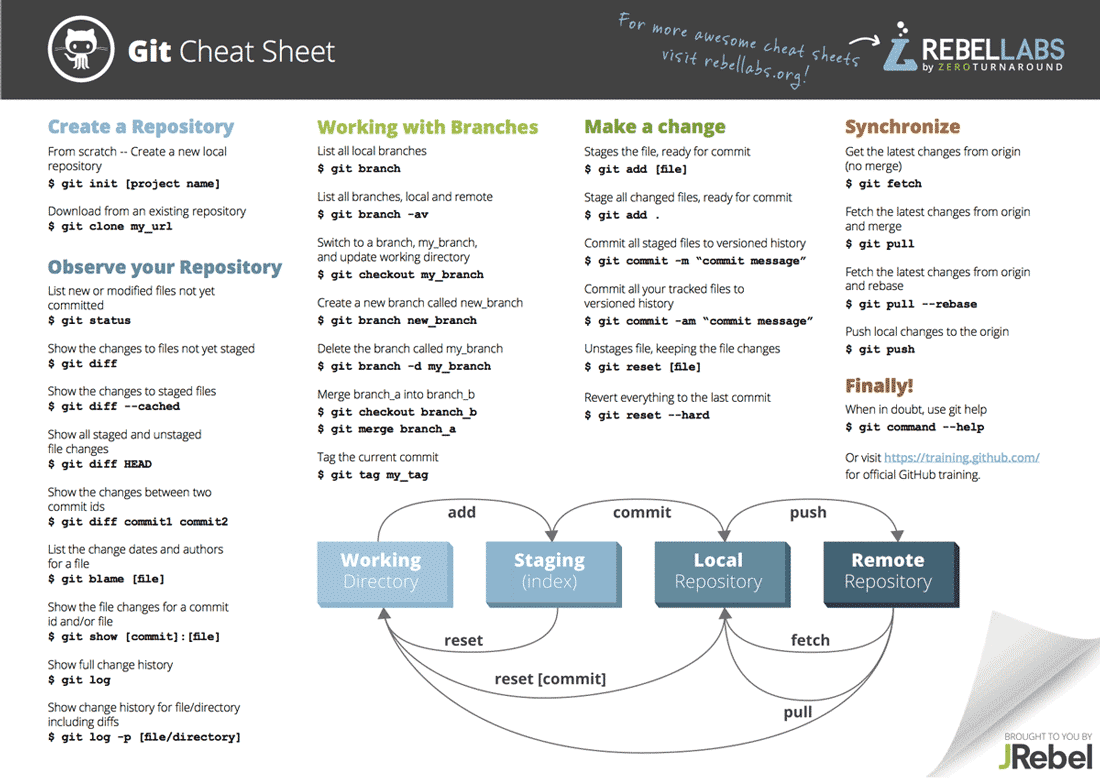
There are several tutorials you should go through if you are not familiar with GitHub.
- https://try.github.io/
- https://learngitbranching.js.org/
- https://rogerdudler.github.io/git-guide/
- https://guides.github.com/introduction/flow/
- https://guides.github.com/activities/hello-world/
- https://kbroman.org/github_tutorial/
Authenticating to GitHub
In many cases, such as using third-party services like we will be using, GitHub requires you to authenticate using an SSH key or GitHub token.
In practice, using an SSH key is a better solution than using a password. However, it does take some time and effort to set up. If you’ve never used an SSH key before, it’s very similar to using your NetBadge certificate to login to Collab. There are two files that are generated - one is your private key (which you keep on your computer) and one is your public key (that you give to GitHub and other places you want to login to). It’s kind of like generating your own key/lock combination, where you can give anyone the lock!